Having one central place on your site where you store all redirects is not only essential, but it can save you time and headaches down the road.
Our recommendation of a plugin to handle redirects would be Redirection by John Godley: https://wordpress.org/plugins/redirection/ . This is a well known and trusted plugin for handling redirects on your site.
Before we get started with redirects, let’s first talk about what a URL is. URL stands for Uniform Resource Locator. It’s the address of a web page. Similar to a house, the address is where that house is located. A URL is an address where a webpage is located. Let’s break down the structure of a URL (Figure 1, Figure 2 and Figure 3):
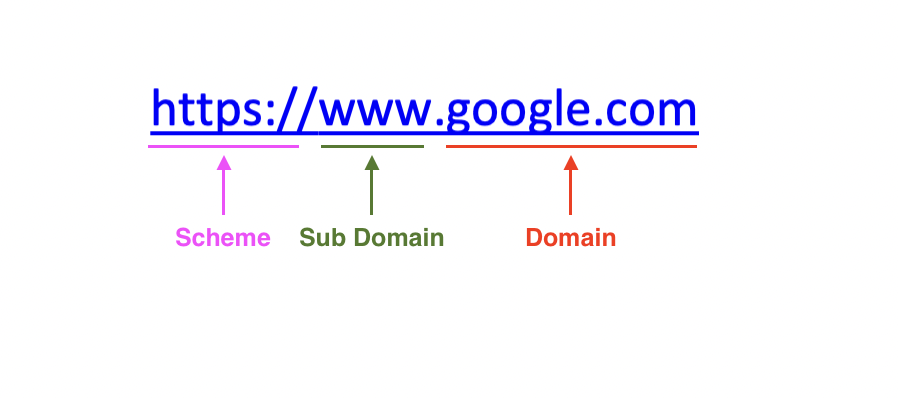
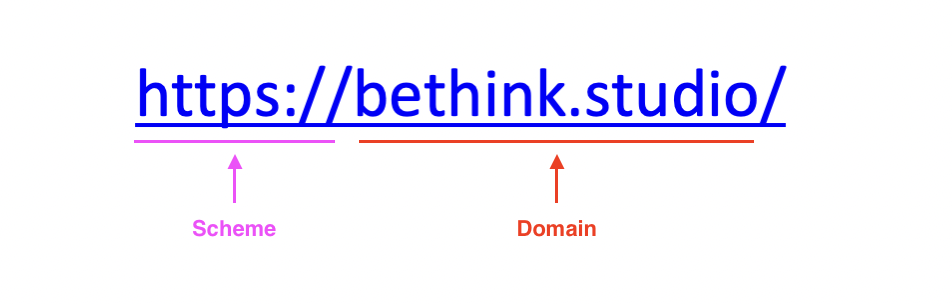
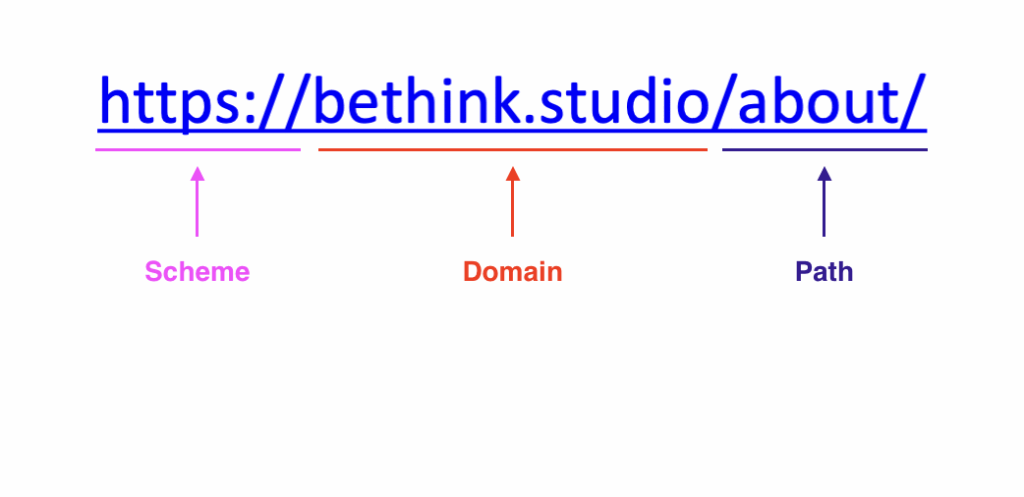
For this article, we’re going to focus on the ‘domain’ part of the URL and the path. The ‘path’ part of the URL specifies the location of a page/file/resource on that website. In the example URL in Figure 3, ‘bethink.studio’ is the domain, and ‘/about/’ is the path, this URL will lead the user to the ‘About’ page located on that website.
But what if you want to change the path of the URL ‘/about/’ to say ‘/about-us/’ instead? This is when you would use a redirect. A redirect can either temporarily (307) or permanently (301) change the path. Most of the time, you’ll want a permanent redirect, which is what the plugin has automatically set. Follow the directions below on how to add a redirect in your WordPress website.
How to add a redirect
This is how you redirect a URL to a new URL using the Redirection plugin. This article assumes you’ve installed the Redirection plugin and completed the set up.
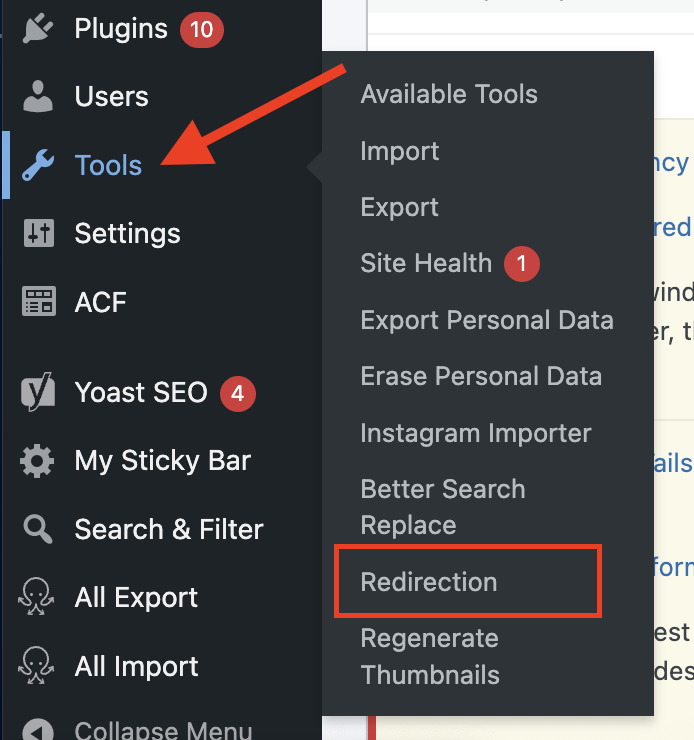
1. Log into your site. In the left admin panel, hover over ‘Tools’ and click ‘Redirection’ (see figure 4)
2. Click ‘Add New’ and fill in the fields: (see figure 5)
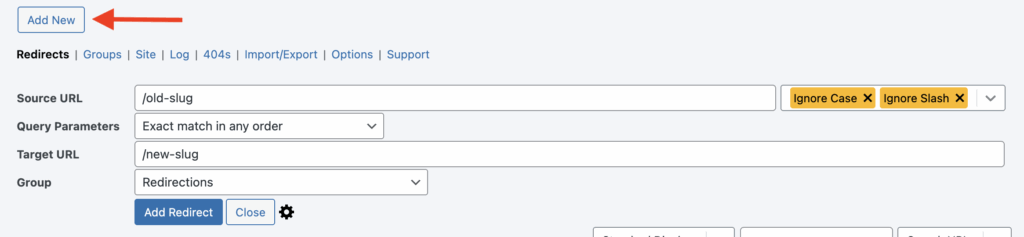
- Source URL: Add the slug of the page you want redirected. (Add the part of URL that goes after https://redrover.org/)
- Query Parameters: ‘Exact match in any order’
- Target URL: Add the slug where you want the page to be redirected to. (Add the part of URL that goes after https://redrover.org/)
- Group: this drop down shows the different groups of redirects. This helps to keep redirects organized in the plugin.
3. Click ‘Add Redirect’ and the page redirect will be added
4. Test your new page redirect
Leave a Reply